July 25, 2022
Information on how to add a lifecycle to a project and manage this.
A project lifecycle defines the series of generic stages a project goes through during the course of its life. An example of a very simple project lifecycle is: Plan, Deliver, Close. Organisations often define the lifecycle(s) to be used by their projects. Approval is generally required to move to the next stage of the lifecycle.
If your organisation has set up project lifecycles, you can apply the relevant lifecycle to your project. You then update this lifecycle information as your project moves through the stages.
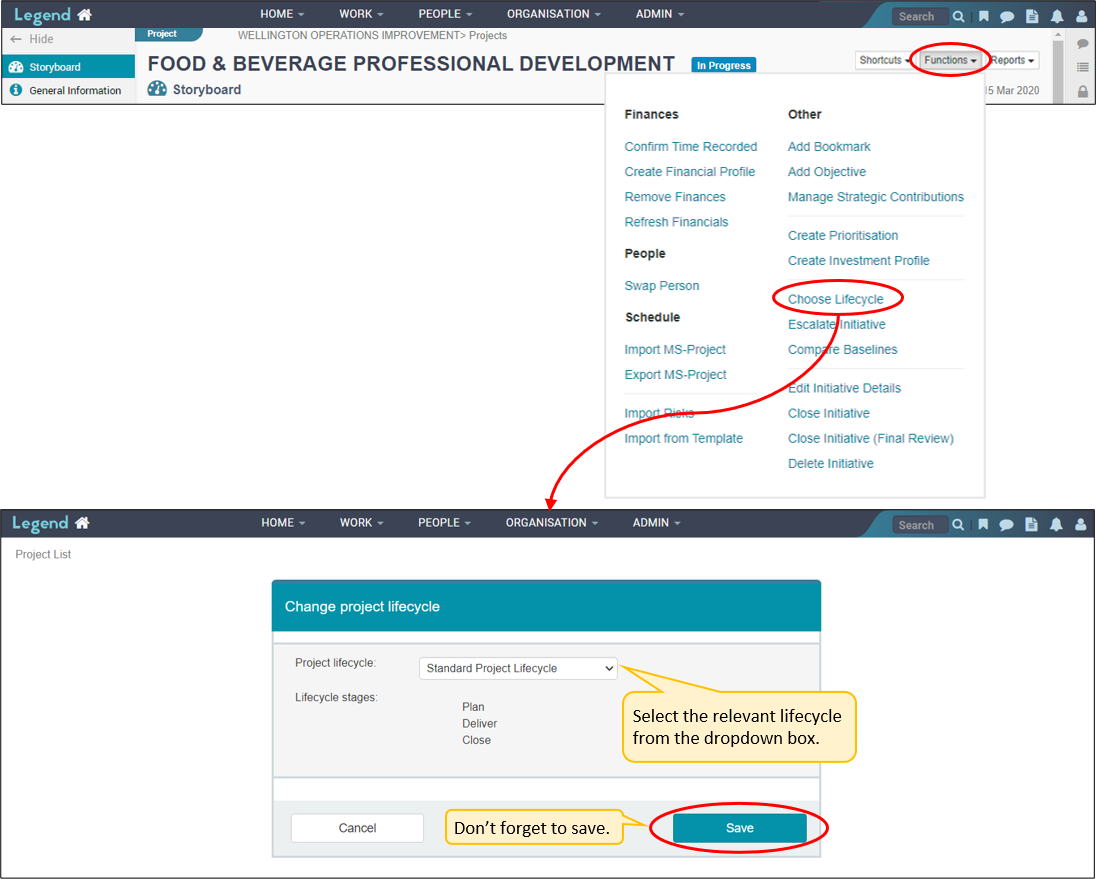
Add a project lifecycle
Use the Functions drop down button to add a lifecycle to your project. This button is viewable on most project views, in the top right hand corner.
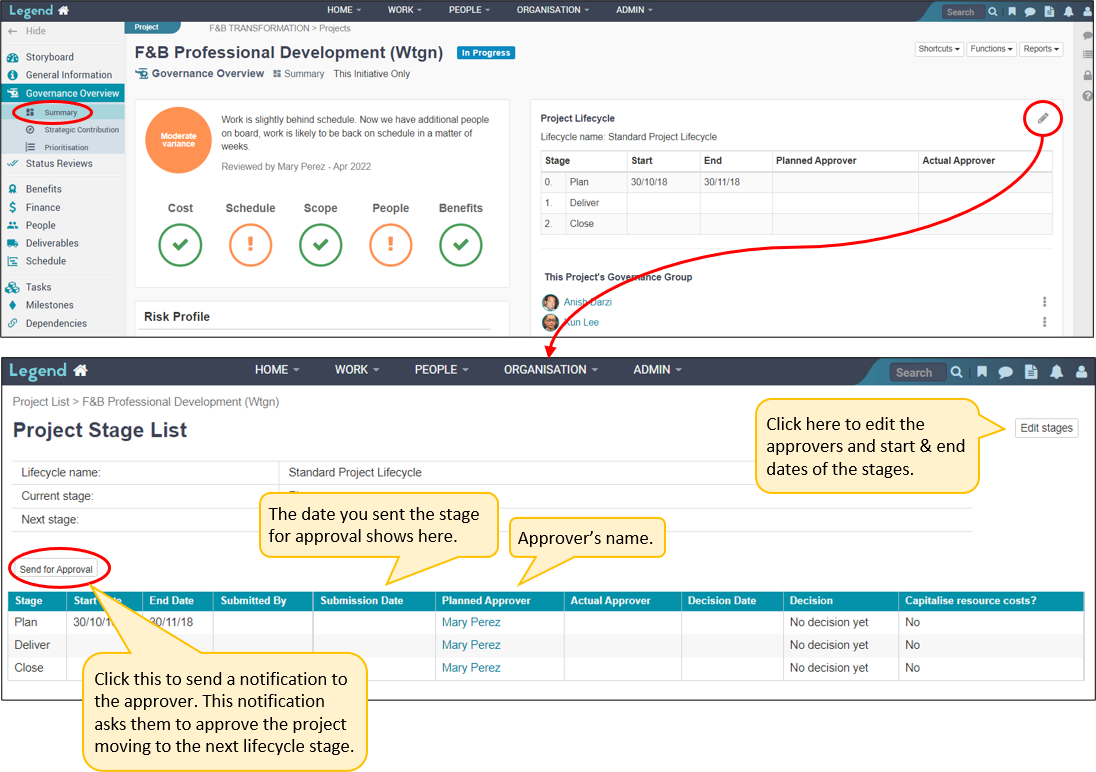
Edit lifecycle stage and send for approval
To view and edit you lifecycle, use the left hand Vertical Navigation Bar to navigate to the Summary view of your Governance Overview tab. The screenshot below shows how you can edit your lifecycle stage and send it for approval. You can also edit your lifecycle from the Functions dropdown box.
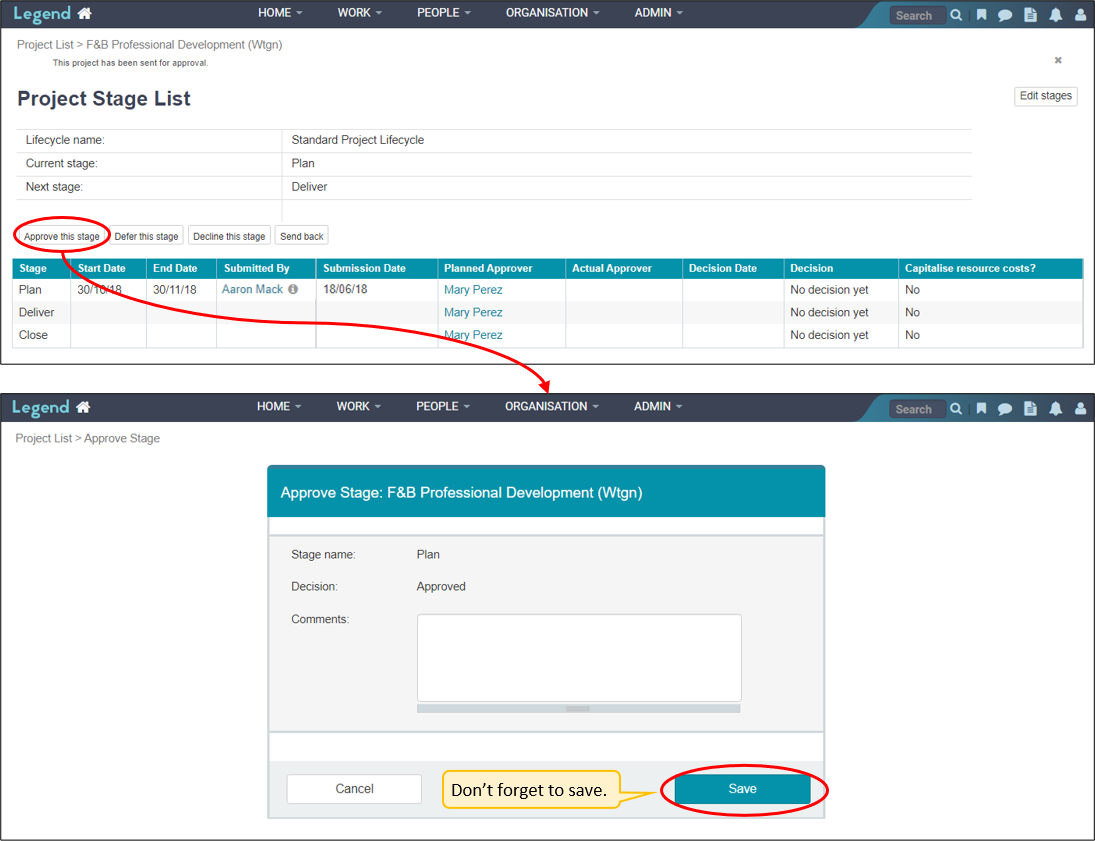
Approve movement to next lifecycle stage
The approver will receive an email notification (provided they have not opted out of receiving email notifications). Clicking on the link in the email takes them to the screen below. Once the approver has responded to the approval request, the submitter will receive an email notification letting them know the outcome.
Note that the approver can also access their notification from the List view of their Home page, where it will show under the Action Required heading on the left hand side.
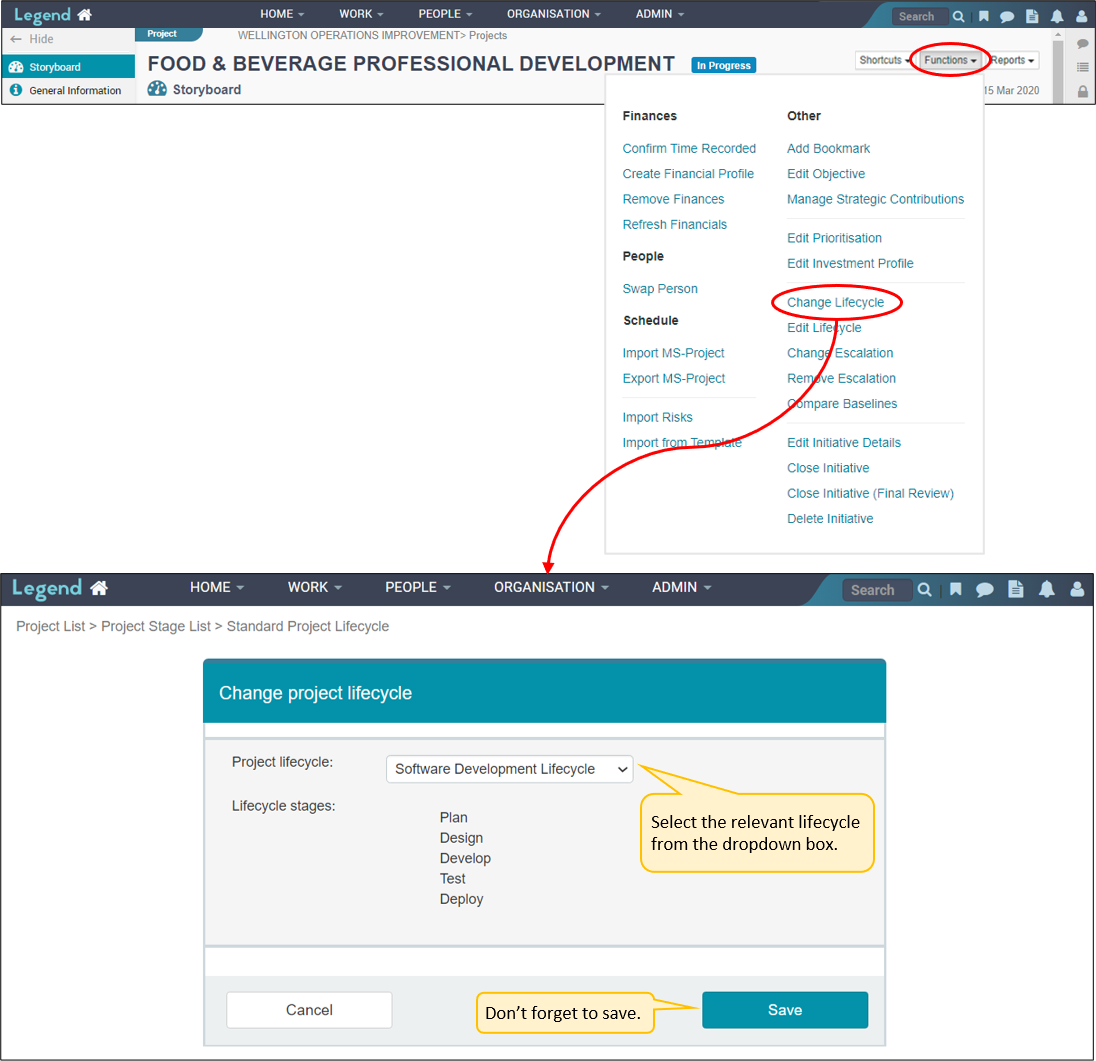
Change a project lifecycle
You can change the lifecycle you’ve applied to your project from the Functions drop down box. Before you change a project lifecycle, make sure you take a note of the start and end dates for the stages of the current lifecycle. When a lifecycle is replaced, approved stages retain their dates, but unapproved stages don’t.